Raspberry Pi has revolutionized the way we approach computing and electronics. This tiny, affordable computer has captured the imagination of everyone—from tech enthusiasts to educators and hobbyists. Whether you’re looking to expand your technical skills or simply test your creativity, Raspberry Pi provides endless possibilities. This article explores some exciting projects that are perfect for beginners, designed to guide you as you explore the power of this versatile tool.
Setting up Your First Raspberry Pi
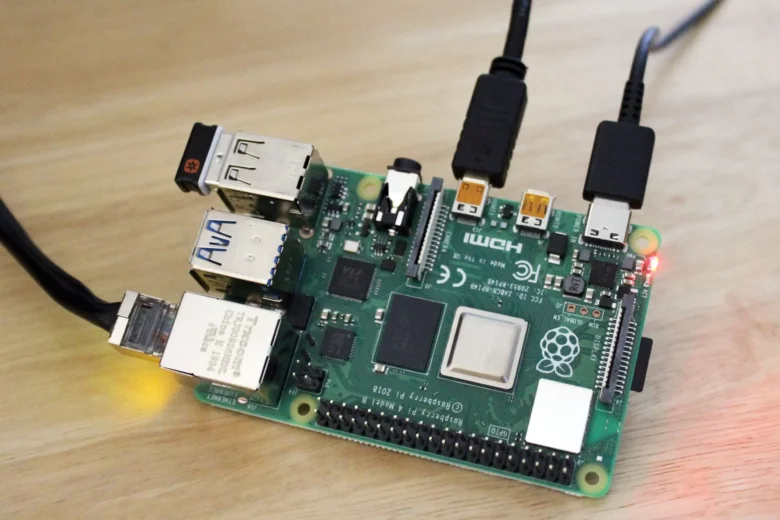
Before jumping into any project, the first step is setting up your Raspberry Pi. Thankfully, it’s a simple process suitable even for those with minimal technical experience. Start by choosing the appropriate Raspberry Pi model; the Raspberry Pi 4 is a popular choice among beginners due to its excellent performance. You’ll also need a microSD card, a power supply, an HDMI cable, a monitor, and a keyboard. Install Raspbian, the Raspberry Pi’s official operating system, onto the SD card using tools like Raspberry Pi Imager. Once the OS is installed, insert the SD card into your Raspberry Pi, connect the peripherals, power it on, and follow the on-screen setup instructions. Voila, your Raspberry Pi is ready to use! This setup will serve as a foundation for all the projects you undertake.
Building a Simple LED Blinker
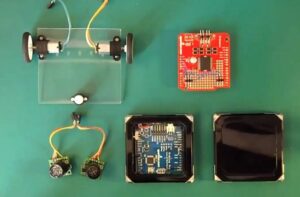
A wonderful first project to familiarize yourself with Raspberry Pi’s GPIO pins is creating an LED blinker. It’s a classic example of how this tiny computer can interact with the real world. To start, gather components like an LED, a resistor to prevent it from burning out, and some jumper wires. Connect them to the GPIO pins of the Raspberry Pi using a breadboard. Code a simple Python script to control the LED light, teaching it when to turn on and off. Not only does this exercise introduce you to hardware connections, but it also underscores the Raspberry Pi’s programming capabilities. This project forms the foundation for understanding more advanced tasks involving external devices.
Creating a Retro Gaming Console
Relive the golden age of gaming by transforming your Raspberry Pi into a retro gaming console. Tools like RetroPie make it easy. First, download and install RetroPie onto your Raspberry Pi’s SD card, then connect a USB controller and a monitor to start playing. RetroPie emulates various classic gaming systems, such as the NES, Sega Genesis, and PlayStation, allowing you to enjoy timeless classics like Super Mario Bros. and Sonic the Hedgehog. While doing this, you’ll learn about system emulators, user interfaces, and how to manage open-source software. It’s a highly rewarding project for gamers and tech enthusiasts alike.
Setting Up a Home Media Server
If you’re a movie or music lover, consider using your Raspberry Pi to create a home media server. By utilizing software like Plex or Kodi, you can turn this tiny computer into a powerful hub for streaming your media collection. Connect your Raspberry Pi to your home network and an external storage drive that holds your music and movies after installing the software of your choice. From there, you can stream content to any device within your network, including smartphones, tablets, and TVs. While simple to execute, this project demonstrates how Raspberry Pi can enhance your home’s entertainment setup without costing a fortune.
Building a Smart Home Automation System
Investing in smart home technology doesn’t have to be expensive, especially when you have a Raspberry Pi at your disposal. With compatible sensors, actuators, and software like Home Assistant, you can control your home environment directly from your computer or smartphone. Set up automation routines, such as scheduling your lights to turn on at sunset, regulating your thermostat, or even monitoring your home security with webcams. Alongside its practical benefits, this project introduces you to the basics of IoT (Internet of Things), a skill set increasingly in demand across industries.
Creating a Personal Web Server
If you’ve wanted to explore web development or share files locally, building a personal web server with Raspberry Pi is an excellent first step. Equip your Raspberry Pi with Apache or Nginx, two widely used web server applications. Install WordPress for easy content management, and you’ll be hosting your website in no time. This project teaches you the fundamentals of hosting, including setting up a database, managing server files, and configuring access permissions. It’s a straightforward way to gain hands-on experience in web hosting while ensuring you can showcase your creativity online.
FAQs
1. Do I need programming experience to use Raspberry Pi?
This is not the case at all! Many beginner-friendly projects require minimal coding skills, and there are plenty of tutorials and examples available online to guide you step by step.
2. Which Raspberry Pi model is the best for beginners?
The Raspberry Pi 4 is a fantastic choice due to its improved performance and versatility. However, the Raspberry Pi 3 also works well for less resource-intensive projects.
3. What programming languages can I use with Raspberry Pi?
Python is the most commonly used , but Raspberry Pi supports several other languages, including Java, C++, and Scratch.
4. Can I use Raspberry Pi with Wi-Fi?
Yes! Most modern Raspberry Pi models come with built-in Wi-Fi capabilities, making it easy to connect to networks.
5. How much does a Raspberry Pi cost?
Prices vary by model, but generally, it’s one of the most affordable computing platforms, with costs ranging between $30 and $75.